
Finally, I hit a new year ground running too! Unlike years of past....
I dunno what snapped but whatever it was, whew, thank you. And whatever it was, thankfully, that motivation has really really stuck around. In fact, I’m having trouble shaking it which is kinda awesome. And wow, it feels great.
Better than great!
The house feels a little lighter and more organized than before though it doesn’t feel enough. I'm supposing it may never.
In my quest to declutter, I decided I should make use of the scrap wood etc. I have piling up. I came across this silverware drawer divider project by fixthisbuildthat on Instagram, and gosh, that got the ball rolling fast!
I didn’t have that fancy tape* but kinda measured a bit, kinda drew it up in the ol’ AutoCADs*, then winged it. My cool woodworking friend Scott helped me out by trimming down a (not scrap) piece of half inch by 11 1/4" by four foot edge-glued poplar into 2” strips and I went from there.
Not interested in getting too woodwork-y with it, I skipped hole plugs* but avoided seen holes and/or screws in general by gluing instead.
I cut a long cross piece to fit snugly in the drawer then cut a handful of pieces for the silverware. Then I ran up and down the stairs, up and down, up and down and I shoulda just removed the damn drawer and taken it downstairs but I did not.
Just as well, I had to test opening and closing it, make sure the divider wasn't pushing out the sides but that it was just tight enough.
After figuring out how close to go with the silverware, I attached those pieces with assistance from that uber spiffy reversible bit and smushed the divider into the drawer. The rest of the pieces I glued* in based on space required, or on center.


Mike didn't see it until the next morning, I kept mum. He gave me such a curious, you-sneaky-nut smirk paired with a head tilt. "Nice work, babe." That's all he said. He's funny. Heh.
 |
| How organized, yah?! |
By the way, if you get anything at all out of this spiffy blog, here’s a solid tip for you:
For solutions to your storage dilemmas, I find one of the best ways is by searching the web with “small space (fill in the blank)” regardless of your spaces' size. Small space bathroom, small space kitchen, small space whatever — you’re bound to discover outside-the-box ideas that will spark imaginative solutions.
I mean yeah, you might have to wade through a load of eh but glimmers are there. There’s nothing like a small space or a small budget to yank large creativity outta ya. The key here is to adapt ideas to fit your specific needs.
To that point, to hit that sweet spot where organization works with you, start by cleaning out an area, like a closet or drawer or desk or whatever. Take everything out, sort it by donate, recycle, repurpose, trash, whatever piles fit you best, cart that stuff away then evaluate what you’re keeping.
Once you’ve done that, replay how you physically use that closet, drawer, desk or area and tailor the organization around its use then the things. Absolutely customize. You’re far more likely to succeed, to keep it tidy and organized if it functions properly rather than forcing your life into a preset gizmo from the store without a plan.
By the way, don’t beat yourself up over decluttering, organizing, cleaning up, or even starting the process. I do constantly, but shouldn’t. Take a minute, do a small something, do a butt wiggle having succeeded then move on. It takes one snowflake to start an avalanche, ahem, non-technically speaking.
By the way too, Apartment Therapy’s January Cure is back on if you need an extra hand. It's like a couch-to-5k but for mess-to-organized. It's not too late to sign up, not too late to catch up nor save to read later.
Back in the basement, digging out some 2x3 or 4 pieces, I fashioned brackets to hold my grandparents' kitchen table chairs up on the wall (two are broken, fyi). What a tremendous space saver; I was able to get the door we took off Mike's office and the door to the utility closet and the door to the basement closet back behind those canvas drop curtains.
 |
| Left, I stacked them vertically first then couldn't fit the doors until I did a raised horizontal stack (bottom right). Top right, the super simple bracket I tossed together. |
I dug out a shelf cutoff and propped it up with other cutoffs and brought it up to the pantry (holy sh*t has it come a long way, damn [and gotten fuller, damn]) that has exploded again, much like the garage does all the flippin' time.
It worked but hmph bleh.......I decided it needed to match which meant purchasing more of these shelves which whew, they were on super sale. Henceforth, I bailed on my goal of no buying, scrap only.
It's fine. Matching is critical here. To me.
So I chopped up a four foot shelf, slid vertical pieces in, and made standing storage for things like my muffin pans et al, as my baking accouterment is growing uh a little uhh fast.
Next I lengthwise sliced up a four foot shelf into two pieces, a wider piece and the remaining narrower piece to make a stacked shelf.
After that, a mini shelf unit for um, yet more baking stuff. cough....heh
Then! I went through the pantry like a purging whirling dervish, tidied up, got items up off the floor (hot tip: a space always looks tidier and feels lighter with things up off the floor) and the pantry feels much better now.
Whew.


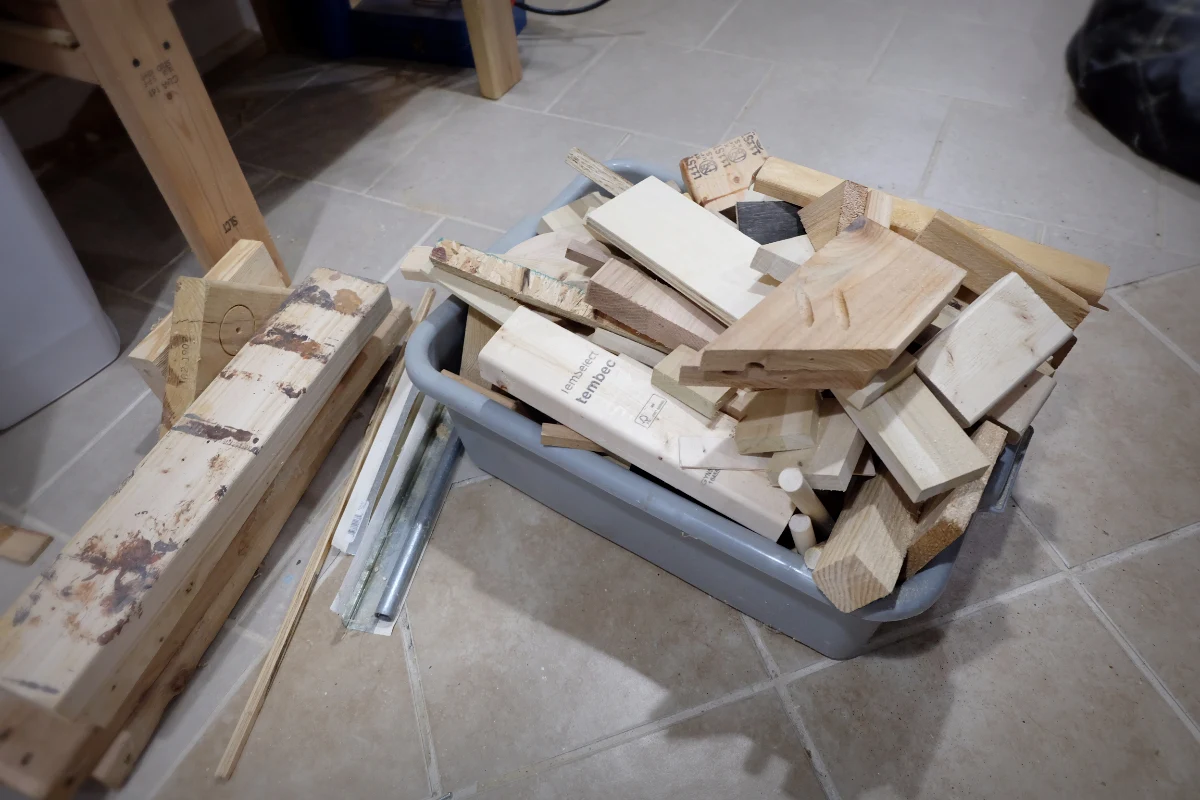
A ragamuffin bin was built for smaller scrap pieces using scrap pieces rather than using a plastic bus tub. Handy. Filled up wayyyy too quickly even after weeding it out. Another hot tip: use chair glides* to help it slide easily across the floor.
This next tidy organizing tip I implemented a while ago and while it's uncomplicated, it makes a huge gigantic difference visually and psychologically: matching hangars. All matching hangars.


Do yourself a favor, treat yourself in fact, and get some decent, non-plastic ones if you can. Those space-saving narrow velvet-lined ones* are perpetually on sale somewhere.
Truuuuuust me, it's worth it, especially if you've got that twitch like me where you just need to have everything look straightened and organized.
Huh. You'll have to really trust me as I am unable to locate my photos. Huh. Heh.
Matching hangars will instantaneously make any rumpled closet look neater. For reals, no joke. Try it. Breathe lighter.
After mine, I did Mike's hanging clothes, a hodge-podge chaotic closet, and bam!, it's delightful. Delightful-ly-ier anyway. Trust me.
Still a few areas and/or cabinets left to go like yikes, the kitchen, and too the first floor bathroom, the latter of which isn't overwhelming. Finn's toy bin, heh. When he's not looking, of course. Maybe the garage? Nah, it's much too cold.
Ok! Happy organizing! Woot!
Coming up: ......lots in the pipeline! Very soon, more on that master bathroom (and shower) progress plus, ooooo-wee, plumbing *cough* fun!
If this project got you going, imagine what you could do. Download The $100 Room Glow-Up Guide and see what’s possible.
*The AutoCAD link is an AutoCAD affiliate link. The narrow painters tape, wood hole plugs, wood glue, chair glides, and velvet-lined hangars are Amazon affiliate links. Mwah, thanks! Please see the "boring stuff" tab for more info.
*The AutoCAD link is an AutoCAD affiliate link. The narrow painters tape, wood hole plugs, wood glue, chair glides, and velvet-lined hangars are Amazon affiliate links. Mwah, thanks! Please see the "boring stuff" tab for more info.


Post a Comment
Please no spam or links, thanks!