It's been a year, 2022, amiright?! Ciao, buddy! I don't even speak Italian. Either way, I thought I'd close out the year with a spiffy Variety Pack.
In reflection, as one is wont to do this time of year, again and as usual, it feels like a mix of lots and nothing got checked off the ol' to-do list. Confusing for sure.
Weirdly, I don't write anything down on a list anymore. And honestly, I haven't even looked at my list binder in probably years which is extra weird as I nevertheless rely on handwritten paper lists.
Well anyway. Let's see what's on the docket for today!
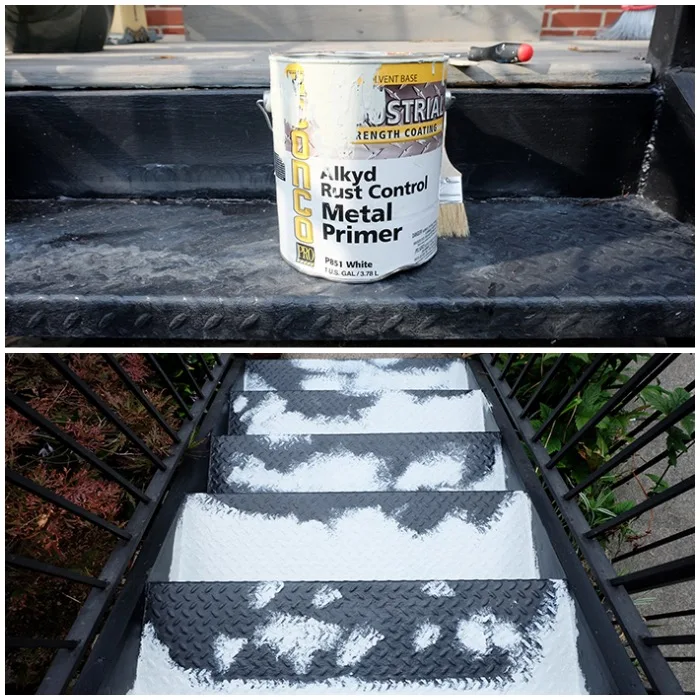
Ah, an update on the ol' metal front stair steps as, if you remember this past spring, some rust came back. I finally got it cleaned up and patched prior to the winter yuck.
Pretty much did the same as the original clean-up, prime, and paint though here I stuck mainly to areas that had failed.
First, and key to our outside survival, slather on the Picaridin.* This stuff is the schnizz, like, ain't no mosquitos getting through this barricade. It's one of the very few things that work for me. That and a Thermacell.*
Get the lotion version of Picaridin. There's no odor, you're not sticky or gross, it lasts hours, and it works. Trust me. Mosquito magnets, we are.
Right, ok, first bug stuff then grinding* away at the parts that rusted or peeled, a little steel wool* action too. Brush that away and it's time to hit the Rustoleum Rust Reformer.* Let that do its work though I do wonder if this stuff does actually work. Hm, seems a research project.
 |
| Probably doesn't appear too bad given the lighting here but letting it go another winter was not in the cards. |
Next day, slap on more Picaridin as it's time to alkyd prime. Didn't do the whole plane of tread, just hit wide of the spots that were cleaned up. Mosquitoes buzzed but flopped away hungry.
Day three, it's paint time. Unlike the Rustoleum* I insanely kept using, the alkyd paint did not dry out in the can over the winter. Nice. Yet another coating of Picaridin on me and then one coat of alkyd paint for the stair, fully painting each tread. Let dry overnight.
Slather slather more Picaridin as it's the next day, paint coat two. Mosquitos are hovering. Pissed off. No free lunch for you, ciao suckers!
One last Picaridin dousing and one final coat of paint for good measure. Mostly I wanted to taunt the mosquitos one last time.
And voila, scrubbed, reformed, primed, and repainted! Fingers crossed! As of this writing after a smattering of snow and ice (no salt!), all is holding steady but we'll check back next spring.
Variety Pack onward!
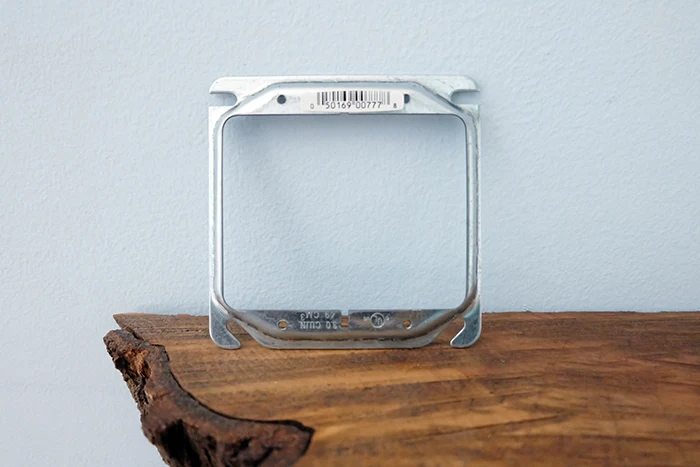
In acknowledgment of a couple of comments over on the spiffy wood lath wall project, I picked up some different extenders a long while back for the switch/outlet on the wall. Was it necessary? Maybe, maybe not.
Now, look. Before we move ahead. If you're going to be helpful and leave helpful comments, I appreciate that, thank you very much. Just don't be nasty, mmk?
Now, look. Before we move ahead. If you're going to be helpful and leave helpful comments, I appreciate that, thank you very much. Just don't be nasty, mmk?
In fact, if you have the urge to be rude on the internet (another charmer elsewhere called my lath wall job, rather jealously actually, "shoddy" and mansplained that "wood burns"), don't. Just don't. It is 1000% possible to convey reasonable information without being a smug a**.
Too, if you're gonna be rude, don't be wimpy anonymous; leave your real name. But honestly? Just don't be a d*ck, ok? Why this ever needs clarifying is beyond me.
Right. Extenders. Ok. There are many different types* to work gaps safely between a wall and an electrical box: the kind I used in the kitchen, frame types, and a sleeved box type.
Right. Extenders. Ok. There are many different types* to work gaps safely between a wall and an electrical box: the kind I used in the kitchen, frame types, and a sleeved box type.
 |
| Before. |
Not complicated here, really. I shut off the power at the breaker, unscrewed the switch and outlet, attached the mud ring to the electrical box, then screwed the outlet and switch onto that. Voila. Bam. Done. Rude people begone.
If our house burns down and inspectors check that outlet, will this type of extender really make a difference over the extenders I had in there prior? Did I really need to do this? Who's to say. Safety is paramount especially when it comes to electricity.** But don't be a d*ck.
Ok. Huff puff over. Onto more Variety Pack.
Let's do something fun: functional organizing. Like making little custom storage shelves in a narrow cabinet with aspen.
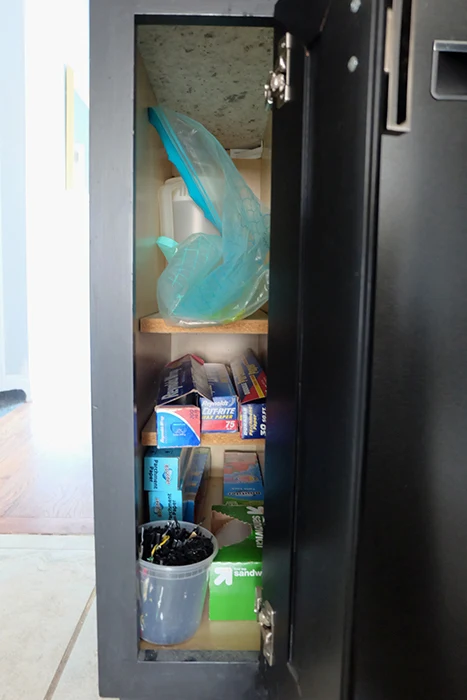
We have two of those sheet pan cabinets in our frustrating kitchen. One is filled with baking sheets of course and the other, when we moved in, I tossed in some temporary shelves to hold things like aluminum foil, etc.
The shelves were so temporary that they kept falling which heh, obviously gets annoying so I finally did something about it.
Using little wood lath leftover bits and a piece of half inch by eight by six foot aspen I picked up, I wedged in a jungle gym of shelves.
 |
| Counter clockwise from top left: cutting the shelf pieces; cutting cutoff leftovers into shelf supports; sealing the shelves with paste wax.* |
First though, I took everything out of the cabinet, edited, then designed around what stayed thereby making it custom to fit my needs, thereby ensuring success. I will say one more shelf would have been helpful but so be it. This works.
Measuring for shelf height spacing I then cut vertical pieces of wood, accounting for the thickness of the shelf pieces, then a cross piece of lath to wedge the verticals snugly into place.
 |
| It's reverse Jenga.* |
I didn't use any fasteners, by the way. This is all held together by force, cutting pieces extremely tight. A couple light dabs of glue* for the top horizontal shelf but otherwise this is completely collapsable and removable. Perfect for renters!
 |
| Hey, why not use those pre-drilled holes you see on the right for shelves, Becky? Because they were only in the front, not in the back. |
To assemble, all I did was place a shelf piece atop my base structure which was then secured in place by continuing to build up. Rinse, repeat.
And voila! Hallelujah, no more floppy shelves dropping all the time! Yay!
All righty, since we're leaving off in the kitchen, let's get to that Variety Pack recipe for you. Ah! Slightly weirdly, maybe misnomered but this Deviled Pork Chops recipe is delish. Then pop on over to The Bake Dept for dessert!
If this all got you going, imagine what you could do. Download The $100 Room Glow-Up Guide and see what’s possible.
Ciao 2022!
Wishing you and yours all the very very best in the new year!
*The Picaridin, wire grinders, Rust Reformer, extenders, mud rings, paste wax, and Jenga are Amazon affiliate links. The sleeve/box type outlet extenders and Rustoleum paint are Home Depot affiliate links. The steel wool and wood glue are Lowes affiliate links. Mwah, thanks! Please see the "boring stuff" tab for more info.
**Disclaimer: Electricity is dangerous. It can hurt you. It can kill you. Bad wiring can burn your house down. It's best to hire a qualified, licensed electrician if you don't know how to wire things. Do not attempt to wire anything without the proper knowledge. Do not ever take wiring advice from me. And do not blow your house up.


Post a Comment
Please no spam or links, thanks!