Yes, the landing. Finally. Omg. Finally.
This was a design and installation quandary which always takes me plenty of
brain effort. Mostly in the installation head space arena as I had to
sort of reverse engineer how to get it in there. Math.
Well, ok, in fairness, the design took some time to figure too.
What I did know, to begin with, was I was using the same
1870's pine rafters
as the
stair treads. But how? Ah yes, therein lay the dilemma.

|
| My Trusty Furry Assistant doing his evaluation and calculations as well on this landing before. |
See, stairs have a best-practices formula to them. Typically a rise
(the vertical) plus the run (the horizontal tread) must add up to a total of
about seventeen to seventeen and a half inches. This is typically what
code requires.
Anything that varies from that generally will be a safety and/or tripping
hazard as this formula is now ingrained into our souls, our natural stair
cadence expectations.
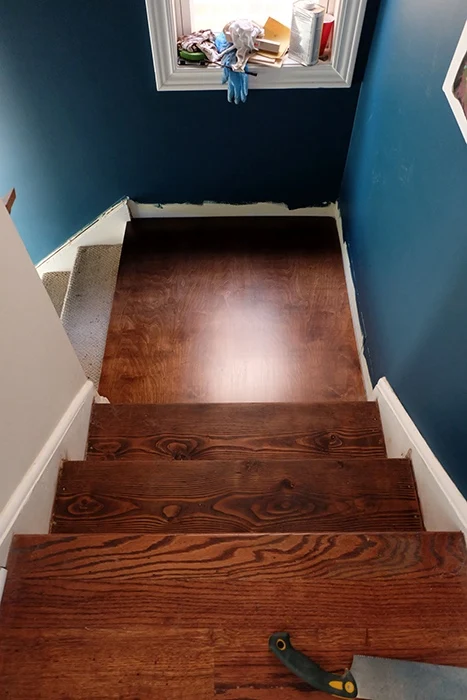
Our stair? Yeah. No. Though now, each tread of our new
stair is the same, each riser is still a bit different, especially once we
hit the landing.
If you remember, which I'd rather not, our stair was originally built of construction
grade two by twelve slathered in nasty carpet. Those I removed but
left and
jazzed up the one by six-ish risers.
Once we hit the landing, the step onto it, the rise there is short.
And the first step to the right
on the last three steps onto
the second floor is incorrect. Someone was worse at
math
than me.
So naturally then, anything I applied to the landing was going to alter the
unbalanced balance.
Dilemma.
So, but, somehow it all worked out and doesn’t feel too funny, probably
because we’re long used to the awkwardness of this spot.
What did I use?
- a 4' x 4' piece of 1/4 “ thick OSB
- more 1870’s Bridgeport church pine, cut into 1/2" thick tiles
- construction adhesive*
- wood hardener*
- water based polyurethane*
- 60, 80, 120, 220 grit sandpapers*
First, I measured the landing. Well, actually I had originally laid
down a piece of three quarter plywood that I had stained, thinking I’d
stain the existing treads. While pretty, it matches the existing floor, the direction this was
all going wasn't doing it for me.
So, I yanked up the plywood and used it as a template for my OSB to trim
up.
Next was cutting my tiles. Yes, this was a messy task, similar in mess
scope to the
wood block headboard, but smartly I did this outdoors this time.
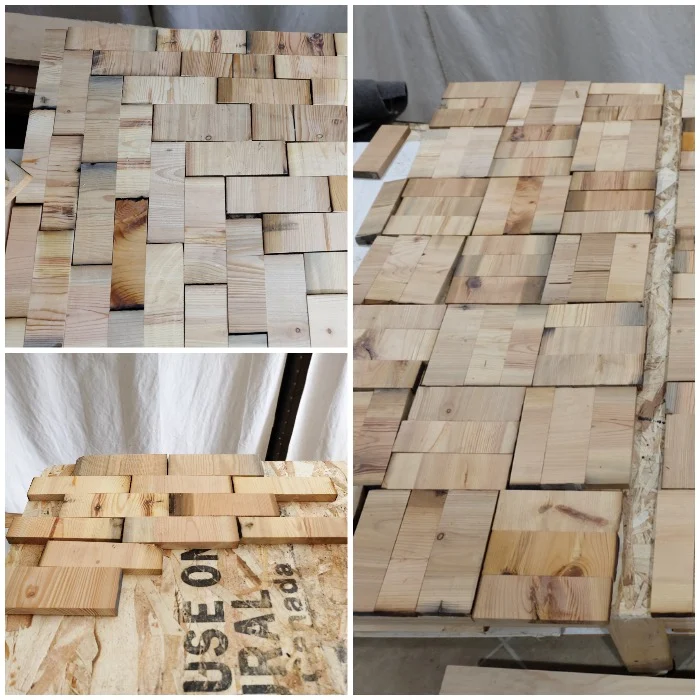
I cut and cut and cut tiles, filling up the OSB as I went so I knew how much
I had, how far to go.
Ah, with cutting finally complete, next was the hard part: the design.
Which way, how, what can…I rearranged these bits of wood oh, heh, oh
so many, too many times.
That’s the thing, just so many options for layout, I didn’t want to miss a
really cool idea. Yeah, FOMO.
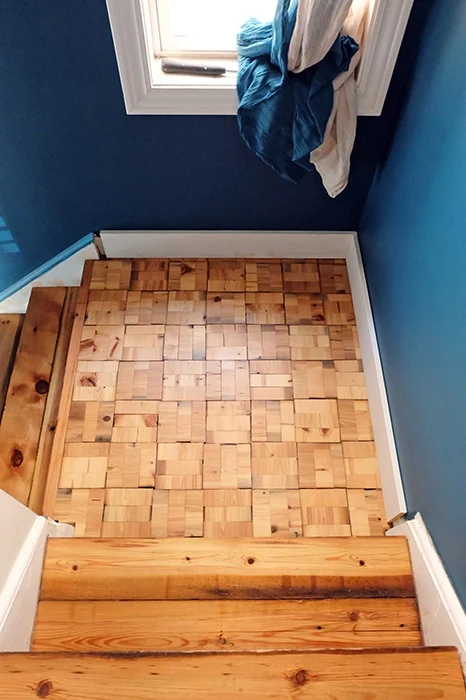
Eventually I grew weary of myself and set the pieces in alternating groups
of three, dragged Mike downstairs, said, “babe. Ugh. What do you think?”
He said, good, do that. So that’s what I did.
Using construction adhesive, all the pieces got stuck down. Not too
snug, not too loose to accommodate for expansion and contraction.
Anywhoo. Let the glue set up. For months. *cough*
A bit ago, I did try squirting caulk into bigger gaps but that was
definitely a mistake that I scraped out later. The concept was there:
fill gaps with something flexible. The result was a big fat
nope.
Right, ok, so a tremendous amount of time passed and only recently did I
finally pick this back up. We had an atypically warm winter day so I
dragged this puppy outside and sanded the daylights out of it.
No, to answer your question, I did not get the surface perfectly flat,
plane, and level, one of Mike’s requirements for this project, so mmm, yeah,
sorry babe, but it is mostly close.
Right, sanded the daylights out of it with multiple grits of sandpaper, my
palm sander,* and
ear protection.* Sorry, neighbors.
Oopfhh, hauled that thing back in and downstairs, managing to not ding
the swanky kitchen doorway
thank goodness, and it was seal coat time.
Recently I was given these
Crocodile Paint Wipes* and hot damn, I am truly super impressed with what they can do. For
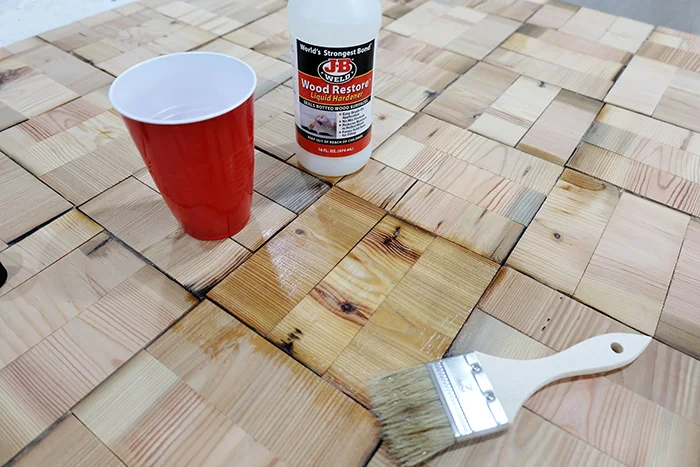
this project, I used them to wipe down and clean off the wood then
coated everything in wood hardener like the treads.
Right, so I decided on the roller cover type that looks like rag fibers,
what are they called....
woven.* Foam will leave bubbles and, nope, I was done sanding.
Too, a regular cover has a tendency to leave bubbles as well and I
knew the raggy ones wouldn’t.
Aaanndddd I was right. Whew. No sanding between! So I
rolled on oh I dunno, six coats of matte water-based polyurethane, stopping
when the surface looked baby-butt smooth. One coat rolled one
direction, the next the other direction.
Now. This next part happens so rarely, sooo rarely, that I am
solidly conditioned for things to go awry because that’s
how my life goes.
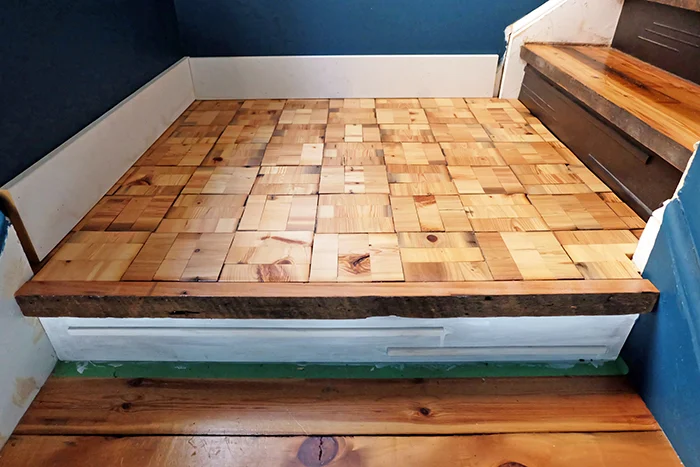
But magically, unbelievably, shockingly, this whole giant panel piece
dropped right in, smooth as silk, no argument, and fit like a glove.
No wall scrape, no squishing, shoving, nothin'.
Just skooched, shimmied, drop, and bingo.
I was so stunned, that I literally stood there unsure what to do with myself
for a good few minutes. Then I did
a butt wiggle dance, careful not to toss myself down the stair.
Yes, no, no fasteners (goodness
I’m so Midwestern); I opted to float it. It doesn’t move at all so no fastening
needed.
Righty-o, I was now ragingly pumped to wrap this up after so damn long so I
raced
downstairs
to cut the nosing piece to hide the rough stair-face edge.
Cut an inch and a half wide piece of the pine, ran (ok, maybe didn't quite
run as by now I’d been up and down both flights oh so many times) up with
my brad nailer,* 2" brads, and slapped that on. And again, my math worked, holy
sh*tballs, stunned again.
Until...
And doh. I about nailed my head. After all this time and work
and oh my....
Handled those nail bits with a pair of
snips,* found the chip that popped out, glued that back in, and set about
sealing the landing-face-side of the nose trim.
And voilá, holy cats and dogs people, we finally have a stair landing in the
enduring saga of the DIY
stair
project! Omg. Halle-frickin'-loo-yah.
Mike said, two days in a row actually, "looks good, babe," so that's an
immense win right there. Whew!
More to come. Of course. Is anything ever done?!
Gotta finish the base trim, paint, final touch-ups, a wee rug, maybe raise
the curtain rod, and this DIY stair project will be a wrap.
Someday.
In the meantime, I will revel in this beaut.
If this project got you going, imagine what you could do. Download The $100 Room Glow-Up Guide and see what’s possible.
*The construction adhesive, Crocodile Paint Wipes, sanders, and snips are
Home Depot affiliate links. The wood hardener, sandpaper, and ear
protection are Amazon affiliate links. The water based polyurethane,
woven roller covers, and Bostitch tools are Lowes affiliate links.
Mwah, thanks! Please see the "boring stuff" tab for more info.








Loooooove it!
ReplyDeleteThank you!!
DeleteThat looks flippin great!
ReplyDeleteThank you so much!
Delete