Ah ok, see, heh, this is what happens, SMDH. I
walk into our master closet and ugh it's flipping a wreck. I should really do some spring cleaning and.....(pause) (slo-mo) oh but what if....what if...(wave of hands) redo!, ooOhh
wallpaper!,
and this and that and that too and kapow, I've redesigned the closet.
I spy something, it morphs out of control, even if I've already done it once,
twice,
five times, and off my brain redesigns. Pew, gone. Then it has to
happen.
This isn't entirely a redo I should say, more of a do. All because
spring cleaning.

|
| Holy heck this is so embarrassing. So. Sooo. But, as are before's. Hey, bottom left, the hoodie racks! |
And I must be pretty you-know-what crazy because just after we moved in, I
installed shelves up the wall. And then installed
more shelves, then
a couple more. So two walls are fully shelved, wipes hands, done.
So therefore, anything wall.........yeah. The shelves have to come down.
And then go back up.
Bat.tee. I am batty.
But!
When all is said and done, this thirty six square foot space will be a divine
design knockout, as in I may move into this lil' room and never come out.
I am that giddy excited.
Though, it might be a hot competition between this closet and
that bathroom, once I finish repainting it for the eighth time. Either way, man,
it's gonna be a helluva Sweet
Suite
with capital S's.
This master closet spring cleaning event kicks off large with
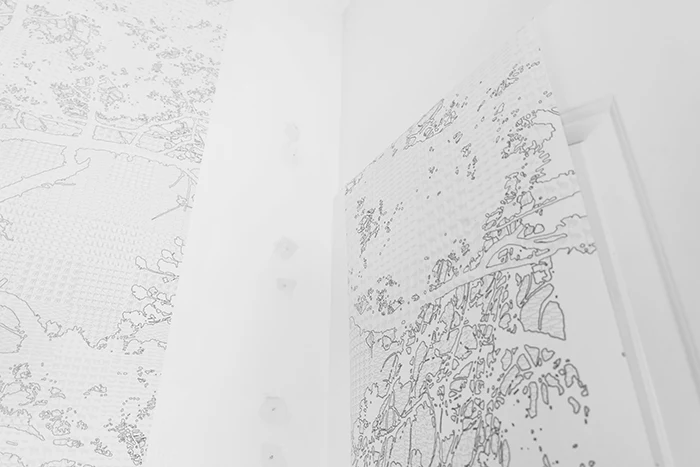
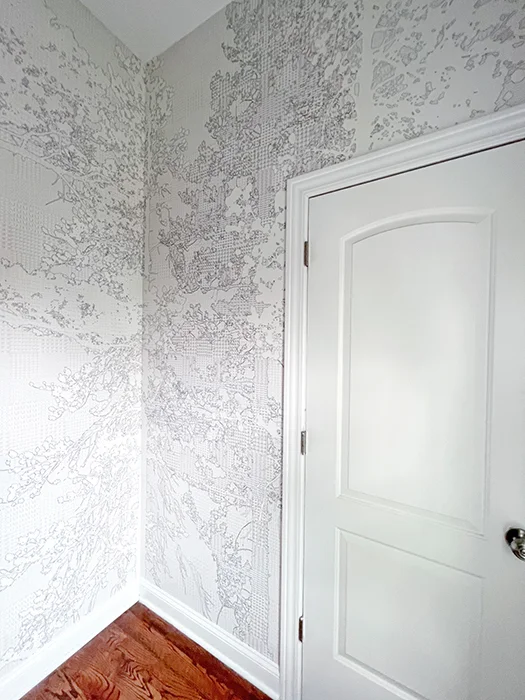
Photowall* and a super swanky wallpaper wall mural on three walls. Yeah! I
ain’t messin’ around!
If you remember,
Photowall* so graciously sent me
a huge, fancy pants wall mural previously. And guess what, they did it again. I need to mention while I
was not paid for this post,
Photowall* did generously send this wallpaper mural at no charge. Opinions are
solely mine.
Now, I'm not going to blather on about how to wallpaper as, I mean, this is
the internet, there are a bazillion zillion tutorials online. What I am
going to do here is share tips for wallpaper that will lead you to success.
Because wallpaper seems fiercely intimidating. While I can't say it's
the easiest thing to do on the planet, it really is not as terrifying as it
may seem. Patience, that's my first and probably biggest tip, have lots
of patience.
Wallpaper though. Love love love it, how it immensely elevates a
room, your house, you. Color, pattern, texture, and if you're lucky, shine. Wallpaper is delightful, exhilarating, fun, and happy, everything
your home should be.
In the case of our previously yawns-ville ol’ master closet here, given it is
(ridiculously) packed with clothes, I stuck with subtlety, whites, grays,
background pattern otherwise it we’d have a visual cacophony.
Little did I know until the paper arrived that the grays in my
Weaving Wood White* mural were actually a checkerboard of cute little animals. Ha!
Pretty sweet!
Ok, next tip, get yourself set up right for frustration-free installation by
collecting every single thing you need upfront to have on immediate hand so
you’re relaxed, no frantic searching for anything:
- ladder*
- plastic tarp*
- bucket for mixing and storing the included paste
- mixing stick
- kitchen scale* if you’re not mixing the entire bag of paste
- measuring cup*
- adhesive primer
- roller and roller cover*
- chip* or any non-fancy paintbrush
- X-acto knife* and lots of blades* or similar
- cork backed metal ruler*
- lightly damp towel (I prefer microfiber*)
- level*
- pencil
- trim guide*
Ok! We're set! There are oodles of
other tools* you can get for this task but I personally find my hands are my best tools.
Find what works for you though.
Let's do this! Spring cleaning!
First, and I'm always going to strongly encourage this, a coat or two of
adhesive primer on the walls. This helps in case there's a day you want
to
remove
said wallpaper, making the process way way easier. Let that dry.
In the case of the
Photowall* wallpaper mural, as I mentioned, the paste is included which you apply to
the wall. While the goo stays wet for several days in the bucket, mix up
only what you need. In my case, I needed only half of one bag so
weighing the powder paste with the kitchen scale nails the right ratio.
Ok! Key to success is the first panel. Measure the width of the
panel, mark that dimension on the wall, and draw a full floor-to-ceiling
straight, plumb line using the level and pencil. If you start crooked,
you end up in wallpaper hell.

|
| Can't really see the line I drew with spiffy level but it's there. And then, woot, first panel up! How exciting! |
My next tip? Make sure you skootch the top edge of paper up past your
highest point to start. Meaning, if you’re starting at the juncture of
ceiling and vertical wall, push the paper an inch or two above that meeting
point. This covers your rear if walls aren’t true, straight, square, or
plumb,
like ours.
The tip means if you’re ordering a mural from
Photowall* which you should because they're terrific, the paper is top-notch quality,
and their designs are outstanding, order it a few extra inches tall.
Which I did, but forgot my own tip and sorta screwed myself.

|
| Another tip? Stage your next panel with the top easily reachable. Here I draped it over the door. |
Then just keep going! You're doing it! Look at you!
Doors and windows will be thorny. Change out your knife blades
wastefully constantly to make sure they are brutally sharp and
trim fat of any corner or turn then nip away until the paper is flat.
Try not to stab yourself. I did. Of course.
Always always always trim on the opposite side of the good side. Yes,
that entails crunching down low at the baseboard. When trimming, start
in the middle and run the knife out to the edge. Starting at the end
runs the risk of tearing, crumpling, and a ratty messy cut.
Another important tip? Work cleanly.
Clean up errant paste blobs, especially on that tarp you've laid out to catch
those blobs. Clean up paper scraps right away, keep tools in the area of
work limited to solely what you need so you're not tripping over them.
Rinse out the towel often.
Schedule several hours for this, more than you'll need so you're not rushing,
take deep breaths, don't panic as you're fine, peel and reposition as needed,
go slow, re-wet with paste as needed, be methodical and patient, deep breaths,
take your time, and don't give up because you can do this.
And voilá, spring cleaning has begun in our master closet redo! Part I
in the books! These tips for wallpaper will position you for the win, I
promise.
If you're still super nervous to try wallpapering, order some extra or get an
inexpensive roll and practice on a piece of scrap something before giving the
wall itself a go.
This closet is rockstar cool already, right?! Sooo eye-popping excited.
Thank you so much,
Photowall!*
Oh, and Mike? He was away when I did this, he didn't know it was
happening. He came home, went upstairs, I waited, waited waited waited,
nothing. No response, no nothing. Nothing!
Hours later, I couldn't take it. "Hey babe, what about the closet?"
"Oh, the closet?," he said. Pause. "Yeah. Looks good."
That was it! ?!?!
Omg.
That guy.
I think it rocks. Woot, go spring cleaning with tips for wallpaper!
If this project got you going, imagine what you could do.
Download The $100 Room Glow-Up Guide and see what’s possible.
Jump to the ceiling
next!
*The Photowall links are Photowall affiliate links. The ladders and
levels are Home Depot affiliate links. The plastic tarps, rollers and
covers, and microfiber cloths, are Lowes affiliate links. The X-acto
knives and blades are Michaels affiliate links. The kitchen scales,
measuring cups, chip brushes, corked back metal rulers, trim guides, and
wallpaper tools are Amazon affiliate links. Mwah, thanks! Please
see the "boring stuff" tab for more info.


Post a Comment
Please no spam or links, thanks!