And again, it is The Coolest.
When I first envisioned this spring cleaning closet redo, as I wave my hands about, the whole look hit me all at once (thank the heck goodness, unlike the bathroom) so when Stikwood was with me, I about passed out in elation.
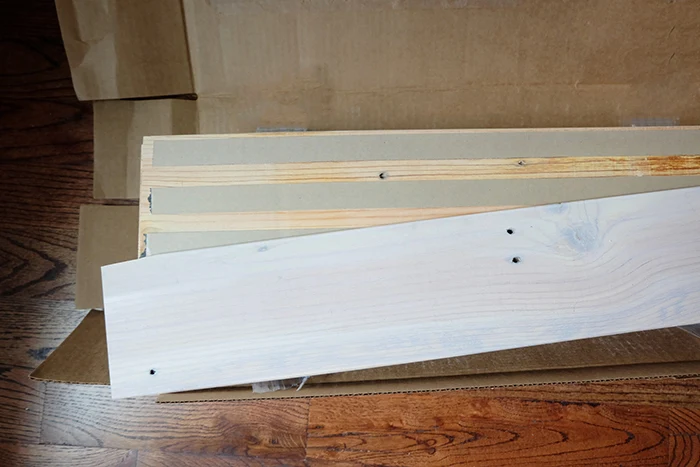
What's Stikwood? It is the most impressive and easiest-to-install product I have used in a good long while, maybe ever, that's what. It's peel-and-stick wood planks. Yes, real wood. Real actual wood that's peel and stick and it's gorgeous.
Nature-made art for your walls.
I must mention that my Stikwood ceiling is part of a Hometalk shoppable tutorial and while this post is sponsored and I did receive free peel-and-stick wood planks, I would buy them out of stock if I could. Do note, these opinions are all my own.
But yes, Stikwood. Holy cats and dogs. It is an outstanding wall decor product and I am shouting from my rooftop, if I could get up there, but you get my metaphorical point.
Just look at Stikwood's site and see, I'll wait. ....Right!?
Here are a few facts about Stikwood for you:
- it is real wood, as I mentioned, real reclaimed, authentic lumber
- the adhesive is strong and guaranteed for ten years
- change your room in less than a day with fast, easy installation
- it's safe for the whole family with no VOC emissions
- the wood is stable; butt the joints right together
- Stikwood is certified sustainable
- the quality wood is sourced and milled in a virtually waste-free manner in Grand Rapids, Michigan
- you buy straight from the manufacturer, shipped directly to you
Where can you use Stikwood? Well obviously if you're spring cleaning your master closet, there. Nearly anywhere actually, even in a bathroom!
Let's get to this because I'm over-the-moon breathless about this Stikwood ceiling project, I can barely stand it.
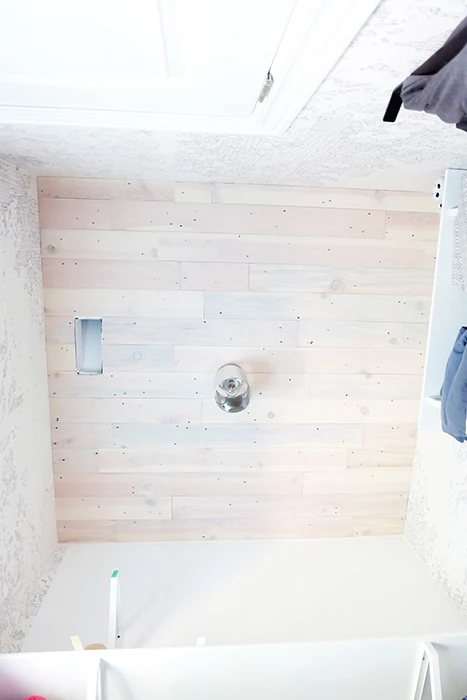
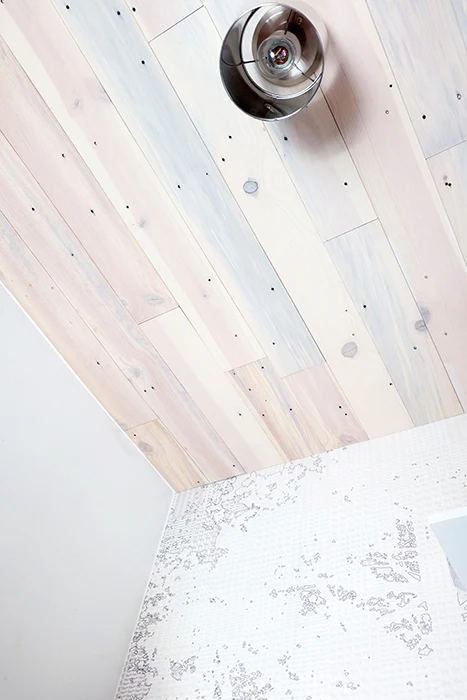
For this project, I chose Minimalist Fir which is stunning in the photos but wow, knock-your-socks-off even more so when in your hot little hands. Fill out this form, get yourself two free samples and by golly, you absolutely should because they have a slew of terrific finishes.
Now. Vertically challenged as I am, ceilings and being on/working on my lil' five foot ladder are not, let's say, my favorite activity. But. Ceilings are the fifth wall, beg for inclusion, they deserve a design touch, and can be the linchpin of a room's whole design.
First, I waited for more wall materials to arrive (omg come back for that upcoming post very soon) to start as I'm a stickler for how materials meet, align, adjoin, and layer.
Based on that blow-me-out-of-the-water material (I'm into hyphens today it seems), I traced a quick line on the ceiling to note where it will be then with my laser measure,* found center of the ceiling.
It's not necessary to do it this way; Stikwood's site has lots of incredibly helpful tutorials on how to apply the wood planks. Scan the box's QR code for on-the-go details. Nice.
The wood planks, they're what some people might incorrectly frown upon as thin; at 1/8" thick, I think they're perfect. That combined with how lightweight they are makes them jaw-droppingly simple to manage, maneuver, cut, and have flexibility for wanky walls like ours.
Therefore, unlike maybe other wall planks, the thickness also doesn't invade into the precious square footage of your room. Win win.
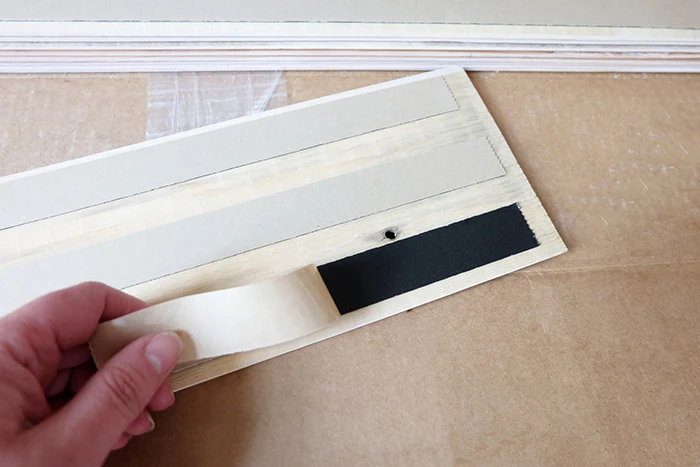
To get going, I measured the length of a plank, exactly four feet, and aligned a full plank on center then seriously, so easy, peel the paper strips and stick it on. Yeah. Ha. That's it! Peel and stick at its utter finest, my friends.
Stikwood advises using a little roller, like the kind you'd use for wallpaper* to give the adhesive an extra little grippy push onto the surface.
Now, you can cut the wood with a sharp utility knife* which I tried and obtained raggedy edges definitely due to user error so instead I went up and down the stairs, up and down up and down, I was ridiculous but need the exercise, and used my miter saw with its insanely fabulous Diablo blade* for instant, super clean cuts.
Cutting, I should mention as my workbench area smells like a densely woody Fir forest, mmm mm. Real, authentic, natural products, huge thumbs up.
The cool thing about cutting the planks is ultimately you can get to zero waste. Use your cutoffs. Going this route gives you a more spontaneous (or ouch, mathematical) layout which I am on board with.
Do note, the adhesive on these Stikwood peel and stick wood planks is migh-tee sticky, very very sticky! Align the edges without touching the wall surface with the adhesive, then press into place. Easy-damn-peasy, no joke.
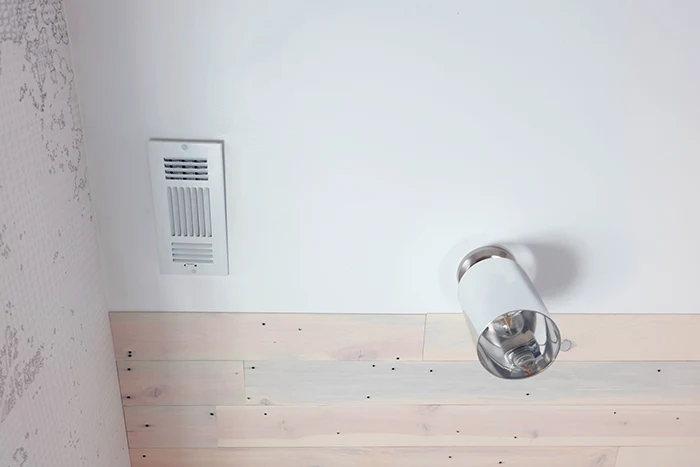
Eventually I got to the anxiety-riddled tricky parts: the ceiling light and the pathetic vent cover, the latter of which was hanging on by a thread. Where, who...every one of our ceiling vent covers is screwed into drywall and how does one not know that this does not work? I don't get it.
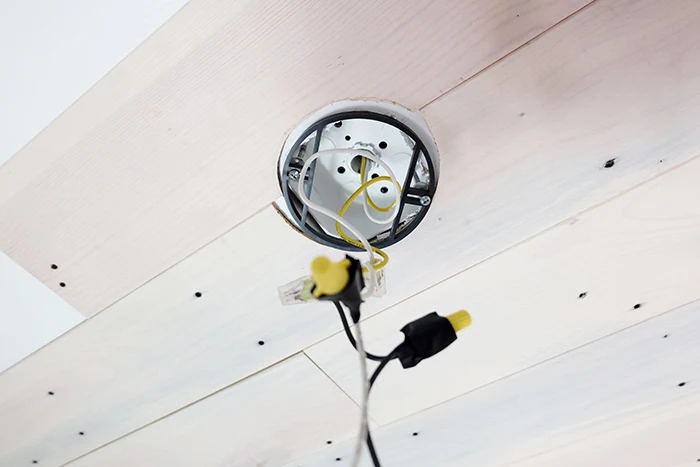
Anywhoo, remembering that the ceiling light gave me grief putting it up, thank goodness I have this rockin' blog and can re-read what went down in order to come at it with intention this time.
Power off, undo the light a bit, trim the Stikwood around these openings with my band saw and my jigsaw, then *smush,* onward! Anxiety disbanded.
Note, that though I shockingly did not muck up a single cut thereby not wasting a single plank, truly a first for me, just like purchasing tile, wallpaper, or the like, add an overage percentage such as ten to your order to ensure extras in case of error or bad math.
Cannot believe I nailed every cut. Probably because these Stikwood planks are so darn easy to work with.
After losing an hour of my life I'll never get back putting in a junction box extender* for the light and then getting everything reattached, it was walk-off home run time.
Due to ya know life popping up here and there, I did this over two days but in compressed time, dropping out that light fixture quarrel and my personal choice to leave the miter saw in the basement, it took maybe two hours at best to accomplish this. Fast. Lightning fast.
Change your room in mere hours. Yeah. As I guffaw in astonishment.
Extra bonus for us here? This closet is freeeezing in the winter, so this additional layer of real wood planks on the ceiling, even though it was insulated, adds just that much more distance between us and cold.
Spring cleaning at its finest, wouldn't you say? A Stikwood ceiling, my friends! Oh my, I am taking a bow for myself and sending air kisses to Stikwood. What a phenomenal product, my goodness, thank you.
Now hurry yourself over to their site because for a limited time if you buy now, you can get ten percent off your order with the code FLIPPING10 and buy them out before I get there first!
If this project got you going, imagine what you could do. Download The $100 Room Glow-Up Guide and see what’s possible.
*The seam rollers, utility knives are an Amazon affiliate link. The Diablo blades, hand saws, laser measures, and junction box extenders are Home Depot affiliate links. The miter boxes are a Lowes affiliate link. Mwah, thanks! Please see the "boring stuff" tab for more info.







I enjoyed your enthusiasm. The ceiling looks great.
ReplyDeleteAw thank you so much! And thank you so much!
Delete