Back, oh, shortly after we moved in, I was scratching my head at a window opening in the kitchen and thought to add some shelves. Make functional use of this randomness, ya know. But over time, sad they became, so time to replace with new kitchen shelves. And add more. And do holes in wallpaper repair.
Well, not all at once. Yet it sounds so simple. hahaha, right?!
The first kitchen shelves I installed were pre-blog.
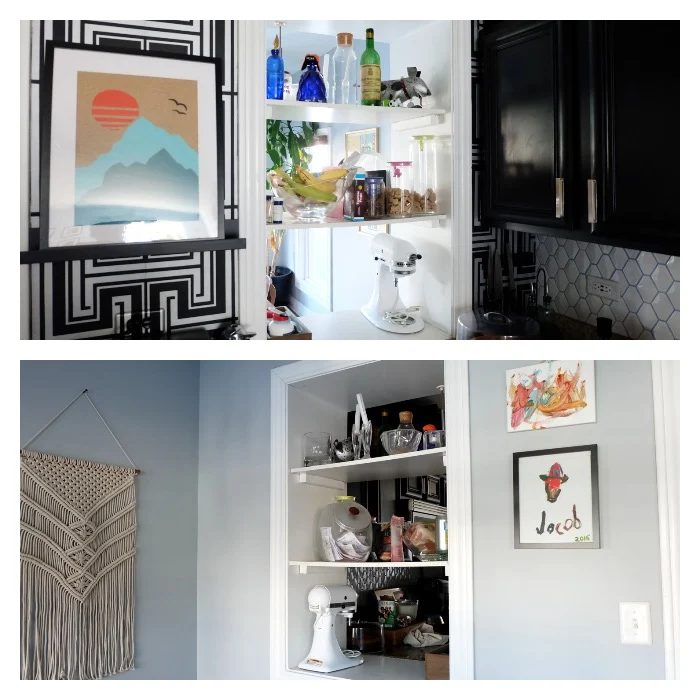
It’s just an open spot where once a window lived. And a big, deep four foot by two foot area that I felt could be kitchen-useful.
 |
| Before. As viewed from the kitchen and then the dining room. The art in the kitchen is for sale here while the art in the dining room is absolutely not for sale. Heh, keep an eye on the mixer and cake cover through this series of photos. |
The wall where this window is was the original back of the building, see. The pantry? Formerly a porch; the whole area was the back stair for the building, enclosed to house what's now our dining room and upstairs, Mike's office and the library.
If you look at the plans, you'll see a thicker wall between the dining room and the kitchen. That's the brick exterior now interior. Too, if you look at the plans, you'll see the former window in the kitchen.
Right.
Some eighteen inch deep plain white shelf panels were purchased from Menards. I screwed some bits of 2x2 up, and plopped the shelves atop. Worked. It worked.
I was never entirely keen on the final presentation of my efforts so it's been on my mind, for years, to replace them.
Enter the plan for the main stair, which I reeeaaalllyy need to get on, with the fancy pants vintage reclaimed pine purchase and voila, tada, uh huh, you know it, leftover wood, let's carry that pine theme throughout: shelves!
For once, for-freaking-once, math worked in my favor. Hal-le-freaking-loo-yah. Yes.
So the pine boards are two by six's, right, so they're generally, and I say generally because this is very old wood milled not to today's exacting standards, generally one and a half-ish by five and a half-ish give or take, lots of give.
To make two shelves, I needed to glue three pieces together each which brought me to, magically, over seventeen inches which was perfect. Perfect! Yay!
Where are all my process photos? Sheesh, sorry. Funny, I just finally found some concrete water bowl stand ones, figures.
Trimmed my pieces down to length, 24-ish” each, a string of Gorilla glue* along an edge, smush the boards together, clamp them and the next day, I had shelves. Nice!
A little sanding, a little two coats of tung oil* to seal then buffed, and upstairs the shelf panels went.
Perusing Menards' site for the word “angle” just to see what would come up I came across these stair angles. Huh, nice. (Lowes* has something sorta similar) While they're pricey, I picked up four because, kitchen, it's the kitchen and I stand here more than anywhere else every day.
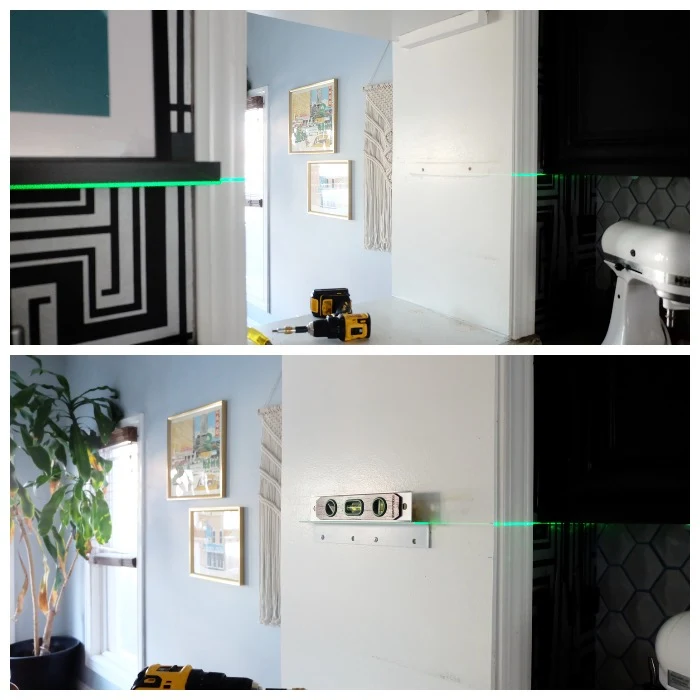
Spray primed* them then spray painted* them white, then whipped out the ol' laser level* and aligned the bottom shelf with the bottom of the cabinets. Going for one continuous visual line around.
Some Wall Dog screws* to hold the brackets, using my flip drive bit* to pilot holes then sink screws, and my shelves are up! Niiiice.
So then I thought, well hey, why not put two above the toaster. Ditch the Ikea shelf I put there which at the time, regretted literally as I was putting it up.
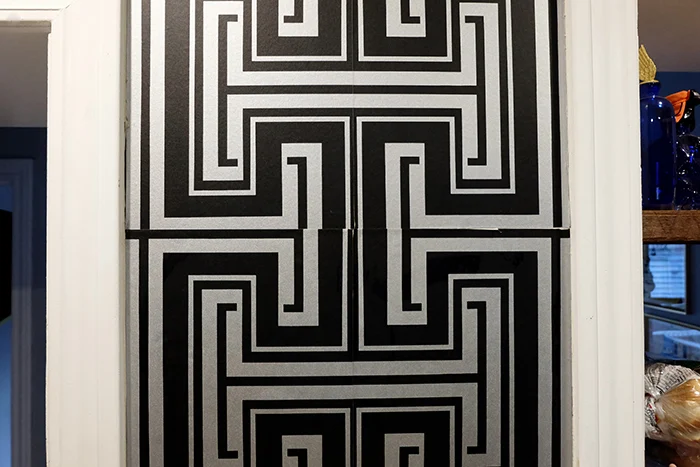
In taking it down, the result was visible wallpaper holes. Dammit. A quick perusal online said hey here’s a totally seamless, invisible way to stitch in a wallpaper patch! Try it! No fail!
Lies!
Ok, it depends on your paper and pattern and skills but it is not painless nor is it seamlessly invisible.
Bonus, it is anxiety-inducing, omg. Cut and peel off wallpaper and hope to all get out you don’t have to redo the whole wall…my stomach was in knots the entire time.
At first I tried going just above the holes but quickly realized I was not going to nail this so I opted to cut higher up where the seam would be hidden by a shelf.
Which was good because no matter what I did, the pattern refused to line up. Deee-nied. And I could not get a nice clean straight cut despite my super sharp fresh Xacto knife* blade and cork-backed ruler* and every-stinkin'-thing else I tried.
So in theory, holes in wallpaper repair is possible. Maybe practice a few times first. And don't try it at say, 6:30 pm like me.
Anyway, ok, so wallpaper sorta kinda redone enough, time to whip out the laser level again and line these shelves up with the window shelves.
I used little black offset corner braces* knowing they’d disappear into shelf shadows and the wallpaper. I did test these first to make sure they’d hold the shelves.
And tada! New kitchen shelves!
So it’s kind of like having open shelves in a kitchen but not because open shelves in a kitchen, while it's a tempting look, are challenging to keep tidy.
 |
| You've been observing the mixer and cake cover right? hahaha The cake here is coming up on The Bake Dept. |
I mean, I’d do it, take out our uppers and shelf the entirety but then Pete the Realtor would kill me plus that’s enormously too cluttered, impractical, unrealistic, and impossible to maintain. Yeah, nope. But it looks nifty.
Anyway! In the end, these new kitchen shelves are way more appealing, way sturdier, ties (future) materials together, and while the darker wood is not good for baking photos, the holes in wallpaper repair was a beast, these shelves are total winners.
 |
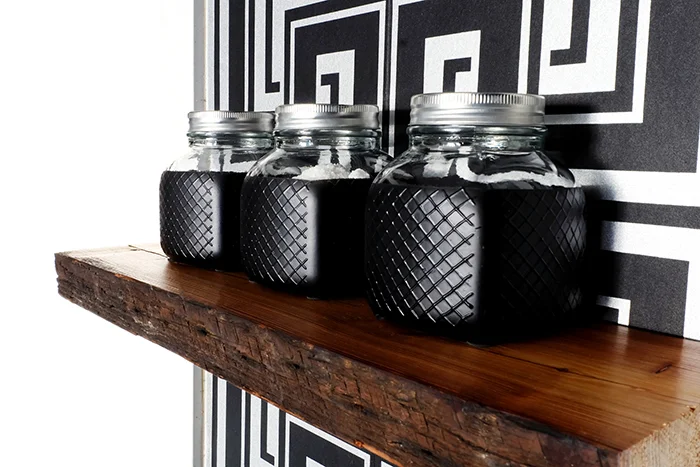
| Lil' Dollar Store Decor: taped off and spray painted some dollar store jars in matte black and now they hold my various salts. Super handy! |
Zero regrets and that’s reward in itself.
If this project got you going, imagine what you could do. Download The $100 Room Glow-Up Guide and see what’s possible.
*The Gorilla glue, Wall Dog screws, flip drive bits, Xacto knives, and cork-backed rulers are Amazon affiliate links. The tung oil and stair angles are Lowes affiliate links. The laser levels, spray primer, paint, and offset corner braces are Home Depot affiliate links. Mwah, thanks! Please see the "boring stuff" tab for more info.


Awesome work, Becky! Those black offset corner braces really blend in well with the wall, I can hardly tell they are there. Great job!
ReplyDeleteOh thank you very much! That's excellent -- my goal was to hide those brackets as best as possible so I really appreciate it. Thank you!
Delete