See. My bestest most greatest oven in the world had that tall console
part in the back with all the power buttons and such.
That oven was, man, that, along with my trusty screw gun...my soul.
I’m a creator, a maker, a doer of things,
Thing Maker, and my tools, whether it’s that
screw gun* or a dang kitchen appliance, are what give me life.
I have a draft "Obituary for an Oven" post about how things went down with
my sweet oven over on
The Bake Dept, I
hope to get that posted sometime in my lifetime, but it was a death.
And I witnessed it.
Baking chocolate chip cookies
and the life just withered right out then bloop vanished as I was standing in
front of it. I cried. I know it sounds bonkers but I literally
cried.
That Bosch 300 Series oven
was the best oven I have ever used in my life. Ever. It never
wavered, at all, no temperature swing, no nothin’. Set it for 350°,
it was 350° until shut off. Perfect as all get out.
Look, I know, I can’t compare its death to watching
Hailey die.
Or
Finn dying next to me. Or my
Dad dying. It’s a hot metal box. But it was a death that hit me hard
regardless. Sorry, that was a bit heavy.
And yeah, sure, it's just an appliance. But it was giving; it
delivered love, happiness, warmth, comfort, sustenance, and more. So
it wasn't just a tool.
Anyway. So in came a
Bosch 800 Series* because, well duh the line of thinking was if the 300 was the schnizz,
the 800 should be too, right?
Well. Not so much. It arrived and in the mad rush to replace my
Beloved because I was in the middle of a baking order, I didn’t entirely
absorb that the back console was missing.
Abt*
slid the new one in, I went to work and….eh. They done mussed a good
thing up. This one bakes using an algorithm. .........I know.
Wtf. Just bake. Be an oven. I was
stressed and upset, wanting my old oven back, wishing it had
been repaired instead.
Anyway, this isn’t about the oven. It’s about a new $60
backsplash.
And partly the first backsplash, why we're here now. Hot tip: when doing a backsplash, pull out
your range and future-proof.
I didn’t have enough of the original tile. Too, there wasn’t going to
be a way to match the blue grout properly enough.
I tore it out. Just one random night at like eight pm, ripped it off.
Without a plan.
Considering this was one of my earliest goes at tiling, it came off rather
easily. Thank you, past self, for not doing the finest job.
Obviously then, the dilemma: replacement.
I happened to be, oh ya know, at Menards one day go figure and walking down
the main aisle, something caught my eye.
Boxes of two by ten tiles for forty four cents per tile. Whaaat?!
So you know, me, I stopped dead in my tracks.
Considering this wall area is around fifteen square feet, each box had just
over six, this was an inconceivable deal I could not pass up.
They had four colors; I snagged one in gray-ish Mojave.
And got it home and looked and looked and head tilted and head tilted.
Almost went back for other colors but my brain barked at me,
stop, do Mojave.
And so it was.
Sure, not the boldest choice but that's ok.
For the layout, vertical was the rockin' modern as heck route. Vertical stack bond, as the pro’s would say. And it was the (chef’s kiss) right
choice.
So was removing the four inch tall granite wall return pieces (see photo before this). Shoulda
done that the first time. And before
wallpapering. And
painting the cabinets. At least one mistake was corrected.
I hit up the ol’
AutoCADs* to help me with
the maths.
If I had been really on top of my game, I would have started center
center but my friends, I was not. I started at the fridge side which
left one inch over by the
knives.* Ah well. Hasn’t bothered me. Yet.
Laid the whole thing out as a full ten inch tile centered horizontally for a
clean visual through-line, leaving four inch at the counter surface, and
whatever at the top as it varies.
Originally I drew and accounted for eighth-inch grout lines but forgot that
as I started sticking tiles on the wall and went with sixteenth. Vastly
better spacing anyway.
I swear, I cannot believe how much this little cheapie tile saw* has done for me and it still just keeps chugging along like a
champ.
And as usual, those itty
tile spacers* fell freakin' everywhere and made me mmmph Batty but, part
and parcel to the task.
Do check for
plumb*
every time you add a new column. Tile like this, in this pattern, one
small nanometer off would have implications across the whole wall. Did
not need that in my life, so yeah, a baby speed
level*
is your BFF here.
Here’s my second shock of this task, tile price of course first: the
beaucoup expensive pre-mixed
tile mortar* I used in
the master shower
was still good. I know. Jaw drop. No additional mortar
expense. Whew!
On the tile went. A few brain-twisting cuts to be made, remembering
which way obstacles went in relation to how to cut them on the tile saw...
A few tiles stuck on per day over the course of, mm, unintentionally a few
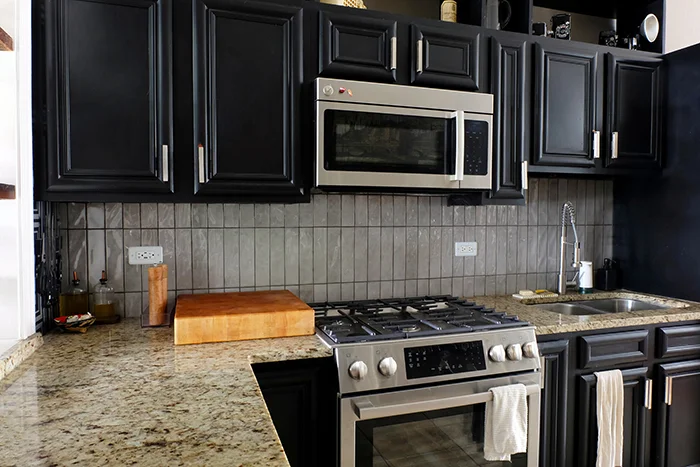
weeks, and bam. Backsplash! New! For $60!
 |
| Tile installed, light at end of tunnel lit. Yes, I clearly missed painting under that cabinet on the right, doh. |
And it blew my mind. Forty four cent tiles, thirty three cents each
factoring in Menards-Math 11% rebate (aka later mailed to you as a store
credit), this handily looks waaay more expensive. Anyone who's seen it
has remarked as such too. Quiet lil' internal pat on the back.
Oh. Grout. Picking a grout color. You beast. Ffs. This is
hard. Harder than paint ‘cuz ya can’t just redo grout like you can
paint.
In fact, make painting even easier with an
InoKraft paint sprayer,* they're awesome.
I was torn between a grout that matched near exactly, thereby creating one
solid field of color or something a little darker. I went a little
darker for contrast and modernity. Shocker.
I mean you can get grout refresh either at
Home Depot* or at
Lowe's,* or
grout pens.* Haven’t tried them, can’t speak to their effectiveness.
And after picking a color and jamming it in there, panic sets in every
single time. You’re used to seeing the tile as is, suddenly grout changes
the whole picture.
And I better note the color here because I check my own blog for reference:
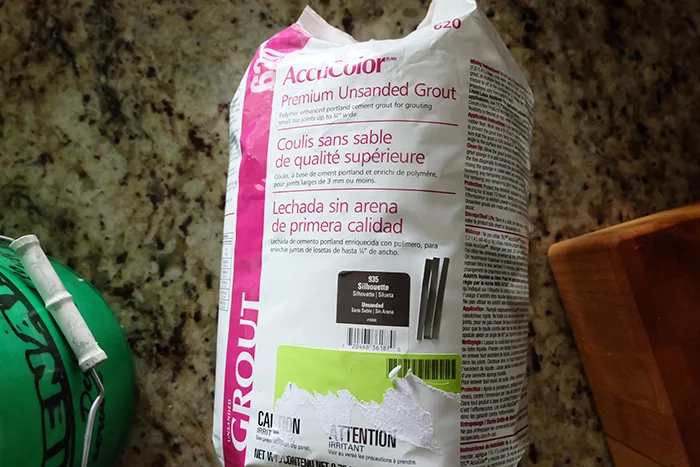
TEC AccuColor in Silhouette.
Mixed it according to the bag’s instructions, loaded some into my
grout pastry bag,* and it was just too darn stiff and dry, so I did what any level-headed
DIY’er would do, smeared it on by hand.
Because I was not scooping out the bag and adding more water to the whole
mix.
Hey. Whatev’s. It did work even if it was “wrong.”
Did
the same clean up as the hall bath, made life so easy, and it was done.
Done! Backsplash! New! Yes, for $60!
All that's left is to
seal the grout.* And address those glaring white outlet covers.
Honestly? This new backsplash look makes
this wee kitchen
look and feel considerably larger.
And while I liked the previous tile and the unique blue grout, this is
modern, elevated, and elegant.
So for sixty bucks, my only purchases the tile and twenty for the grout,
this is quite the swanky DIY redo. And it looks like a $600+ tile job.
Wish I could be as pleased with this crap oven as I am my new backsplash, but, I'm on it.
Chalk this new backsplash up as a check and mark and captial w Win.
*The Dewalt drills, tile saws, tile mortar, grout refresh are Home Depot
affiliate links. The Bosch 800 Series oven link and Abt links are Abt
Electronics affiliate link. The AutoCAD link is an AutoDesk affiliate
link. The magnetic knife holders, grout pens, grout bags, grout sealers,
and InoKraft paint sprayers are Amazon affiliate links. The tile
spacers, levels, and grout refresh are Lowe's affiliate links. Mwah,
thanks! Please see the "boring stuff" tab for more info.


Great job but one question. The tiles looked like a mat finish throughout your tutorial yet the end pictures the tiles had a beautiful gloss and sheen. Was curious why this amazing transformation. I had my kitchen redone 5 years ago and the contractor purposely brought the tile behind my 8 year old range so when this one finally goes the new ones with the missing back board will not show a naked wall. Once again great job!
ReplyDeleteAh I hadn't noticed that, interesting! I think it's a combination of lighting, time of day, and photo angles as the tiles themselves were very glossy right out of the box. Your contractor was super smart to future-proof, what a relief! Thank you very much!
DeleteLooks great with the black cabinets. You did a wonderful job with the alignment of the tiles.
ReplyDeleteThank you so much for your super kind words! I really appreciate you taking the time to be so nice, thanks!
DeleteLooks amazing !
ReplyDeleteOh thank you very much!
Delete