There are a zillion tutorials out there on how to repair a wall, for sure. What makes this one different?
Well. Heh.
Back there in our now-fancy closet, after putting up that beautiful WE Cork wall and then putting the newly extended shelves back in, and then putting clothes on said shelves, two shelves totally refused to stay up.
Now normally this wouldn't be a major issue, well, if the gorgeous cork weren't gracing our walls. Right? Of course. Easy repair.
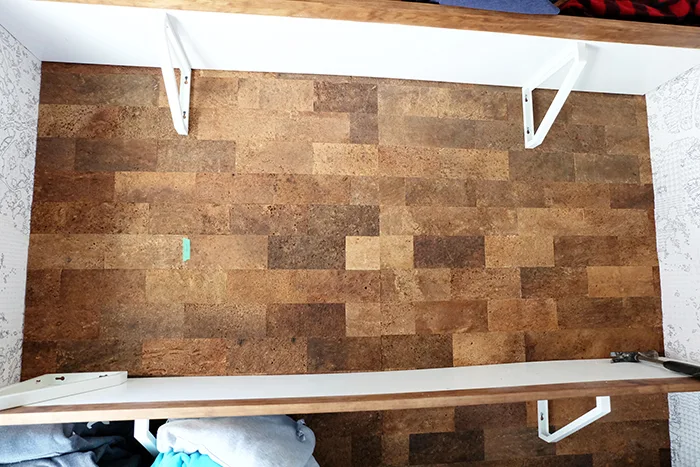
Well, sort of. The shelf brackets are aligned with each other going up the wall.
But because that glorious cork is glued onto the drywall, the failing shelves were shredding the cork on top of tearing apart the half inch drywall.
As such, yeah, I was hugely stressing over what to do, how to fix this....
I mean, I knew what needed to be done. I was simply totally tweaky about actually completing these repairs so it took me, yikes, I think a pair of weeks to gird myself, measure a million times cut once multiple times in my head to formulate the plan, get in there, and truly do it.
Beeeccaaause, obviously. This was scary. Right?!
Cutting was involved. Required. Cutting cork. Cutting drywall. Not panicking. Shoring things up. Not panicking. Replacing everything. Panic-free.
Now, from the initial installation, I knew how easy peasy it was to trim the cork with a utility knife.* Super easy.
The cork panels are made up of individual brick shaped pieces attached to a full backing panel of cork, the latter much like the rolled cork I used on the Fancy Scrap Plywood Closet Shelves. Albeit thicker. So it's two layers of cork all together.
And thankfully I had leftover cork around which is absolute case in point for definitively ordering more materials than your project requires.
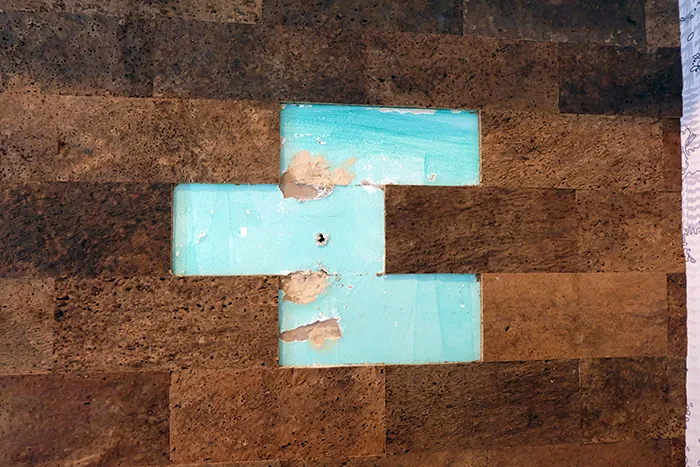
Ok, so for the cork, what I needed to do was trim out individual bricks and peel them off to access the wall. Scary. .....Scary.
Right so then how to repair the wall because it was shredded badly in one spot. The shelf bracket needed to go back in that exact spot.
That meant cutting a big hole in the drywall.
Ok, wait, let's just get to this How to Repair a Wall business and I'll explain as I go with photos. You'll see why I was in such a tizzy. Looks like I jumped the gun on the repairs and didn't get true before shots, apologies.
 |
| If you squint, you can see where the yellow arrow is pointing, damaged cork. The spot to the right where I already removed cork was way worse. |
As I said, first I had to remove individual brick rectangles of the cork. Because they were individual bricks, there were seams so I followed the seams.
Cut carefully and then pry off the wall. Key to cutting anything by hand with a knife is to not go whole hog, dive deep, try for one swipe. It's taking several passes at slicing so a. your knife doesn't slip and damage you or anything around it, and b. you get safer, clean cuts.
Yes, initially I tried patching the destroyed drywall but my soul knew this was not the correct fix. On the left in the picture above, the stud is where the green painters tape* is; I had missed it initially so all I needed to do there was patch, re-find the stud, and screw directly into it.
The right side was the disaster side.
 |
| Exploded wall disaster. |
Ok. So what I did here....
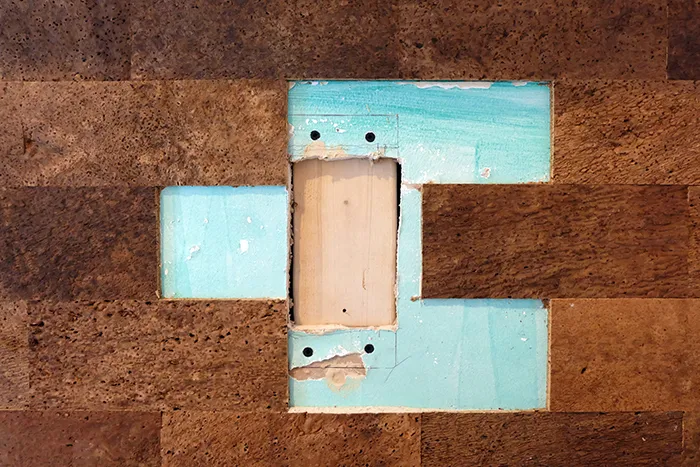
....was grab a piece of scrap 2x4, traced it around the ruined drywall.
Next? Time to cut the drywall which I did with my handy dandy drywall jab saw.*
Yes, I was scared. Yes, head down, plow ahead, I did it. Now, note, the hole is smaller than the piece of wood which is important because you need surface to screw the wood to the drywall.
How do you get the wood in there?
Sink a screw* into the piece of wood to act as a handle, tip the wood in there while holding the screw, and pull it tight to the wall.
Then with your other hand, yes, you become quite the juggler here, screw through the drywall into the wood to attach.
At this point I exhaled a heavy heavy sigh of anxiety-relieving ok, gonna get this, thank the heck goodness. How to repair a wall nearly wrapped.
Then just screw on some scrap drywall and patch.* It didn't have to be pretty, thank goodness again, because I was refilling these spots with leftover cork bricks.
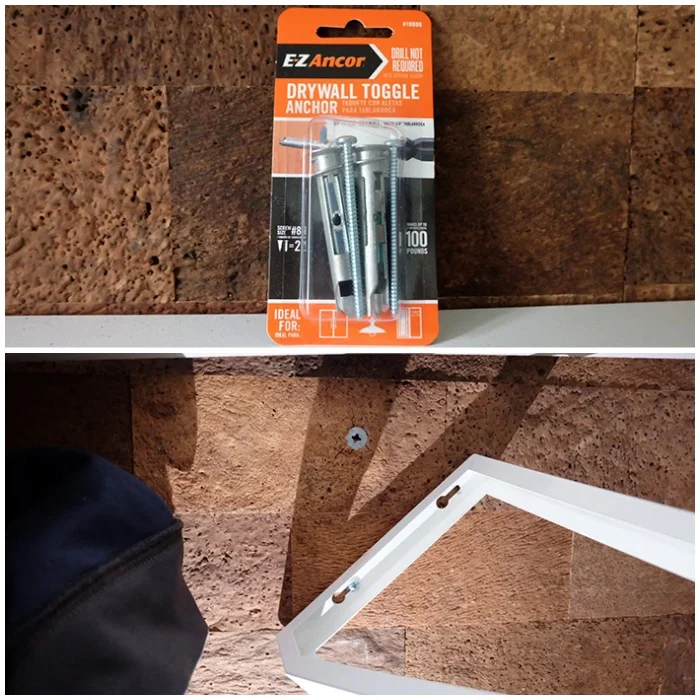
Oh, to repair the shelf below this spot which wasn't nearly as bad off, I overcompensated with some one hundred pound toggles.* Not messing around. Wanted to not revisit this ever again.
Cut my replacement cork bricks, slathered on more 3M Fastbond 30-NF,* squished my bricks in.
Aaaaand voilá, omg, I did it. I think I did a bend over, heavier deep sigh at this juncture. How to repair a wall, tada! Now I can sleep.
All that was left was to reinstall/reattach the shelves which was way way way easier and holy heckin' secure with the wood in there.
You got a hole? No problem! Now you know how to repair a wall. Curtsy.
Oh hey, by the way, really cool?
I'm assembling awesome eBooks of fun stuff, all packaged conveniently together for instant download easy reference at your leisure! Find details here! So if you're into making dowel projects or Dollar Store decor, I've got those ready for you. More are coming so check back! There will be baking recipes too, yum!
Yes, they are for purchase but your purchase helps me help you with loads more fabulous projects. Thank you!
If this project got you going, imagine what you could do. Download The $100 Room Glow-Up Guide and see what’s possible.
And Finn is doing all right. The stress is unrelenting, we're incessantly worried, trying to fix his uh, um, up and down intestinal issues, we're trying to keep it together, some days are better than others but in most ways, you'd never know Finny Boy's got the nasty C. Truly, your warm wishes are so enormously appreciated, thank you. xo
*The utility knives, drywall jab saws, toggle wall anchors, and 3M Fastbond 30-NF are Amazon affiliate links. The cordless drills are a Home Depot affiliate link. The painters tape and drywall patching products are Lowes affiliate links. Mwah, thanks! Please see the "boring stuff" tab for more info.


Great idea and good fix! I'm having the same issue and was trying to figure out how to add the wood, behind the drywall (cutting drywall - oh my) or adding a piece of wood in front of the drywall - not a nice look. However, I'm confused, if you added wood and screwed the brackets back onto the newly inserted wood, why would you need the toggles? Were the toggles for the L or R side?
ReplyDeleteThank you! I'm sorry you're in the same spot! I have faith that you can do this! So sorry about the confusion -- I used toggles in places where I didn't add wood, such as the shelf below this repair. For the repair where I added the wood, I was able to screw through the bracket into the wood so it's super secure. I hope that helps! You've got this!
Delete