There’s a slew undone here in the ol’ dwelling residence, touch-ups, finishing bits, sanding, snippets, caulking, whatever naggy smidgies that need to get done. A kind of molehill, not quite a mountain but definitely getting there.
Just can’t get motivated to do all that. I find I’m getting worse about wrapping those small bits up.
No idea why as it’s SO satisfying to finally get every aspect of a project taken care of, dust off the hands, and walk away. Probably because they’re boring and tiresome.
So enter my mom with something to build!
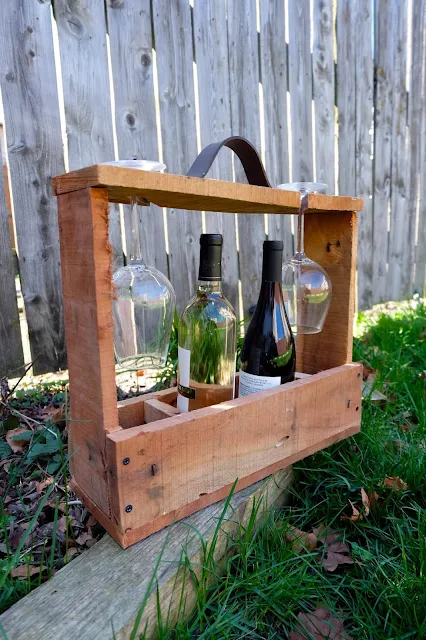
See, a pal dropped off a slew of old fruit crates and my mom sent me screenshots of this spiffy wine carrier caddy thingama-whoo-ha-jig, stating the caddy would be a great upcycle of some crates.
And she’s right. But the crates are to sell.
Still though, the project was too cool to pass up so I built it anyway. Plus it gave me another exceptional excuse to use more wood that's taking up space. Win-win!
When I checked out these photos and sorry, they're screenshots and she doesn’t know where they’re from so unfortunately I can’t credit the maker or seller (if you know, please let me know), I knew exactly what of my stash I was going to use.
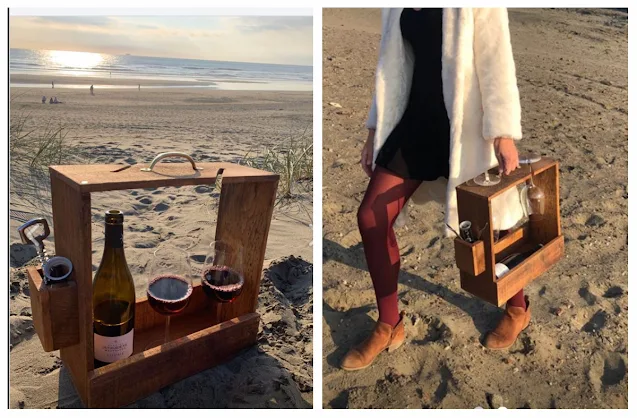 |
| Pretty spiffy project, ay? |
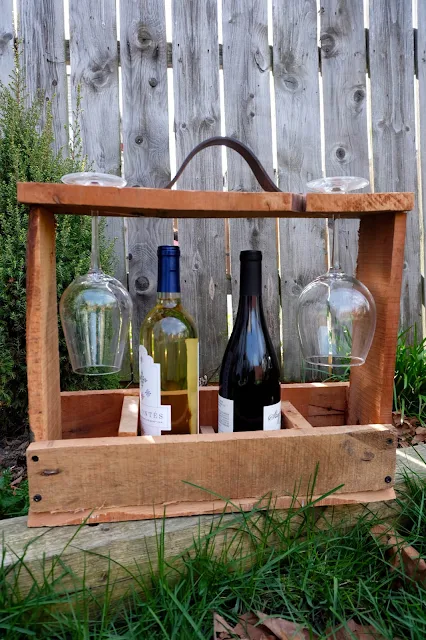
But now I knew! And now I've used up my mahogany collection creating not only a cool carrying contraption but a nice chunk of empty shelf space. Thanks Mom!
How I built this was dependent on the wood pieces, tools, and materials I had on hand without a Menards run. I winged it and created as I went but later organized plans, drawings, so it can be built using nice wood, tidy edges, a nicer more polished finished project.
Subscribers to this schmancy blog will get a separate email, just like the Pegboard Wine Rack plans, hm, I’m noticing a certain liquid related theme and if you’re new here, this subscribe link will take you to the plans.
Note that you can totally adapt this to fit your specific needs, wants, tools, design aesthetic, design choices, material choice, and/or hardware desires.
We’re a two bottle family, in that one drinks red (Mike) and one is a soccer mom (white) (no offense please; Mike picks on me, my wine tastes) so if we’re going somewhere and bringing wine with, we’re bringing two bottles. That also factored into my version.
As you can see in the original above though, it’s made for one bottle laying down which you can most certainly do. And what I would have done if we weren’t a two bottle family.
What I used:
- Mahogany pallet wood pieces, 6 plus scraps
- Flip drive quick change bit*
- Drill bit*
- Various screws*
- Leather belt
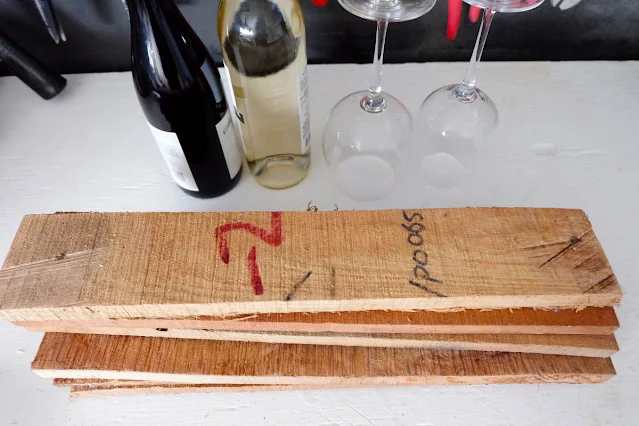 |
| Supplies! |
Based on the wood I had and its existing dimensions and bottle dimensions (I was avoiding trimming wood, removing nails, etc. so as not to lose the weathered-ness), I attached the two side pieces in a butt joint, the sides sitting in the bottom.
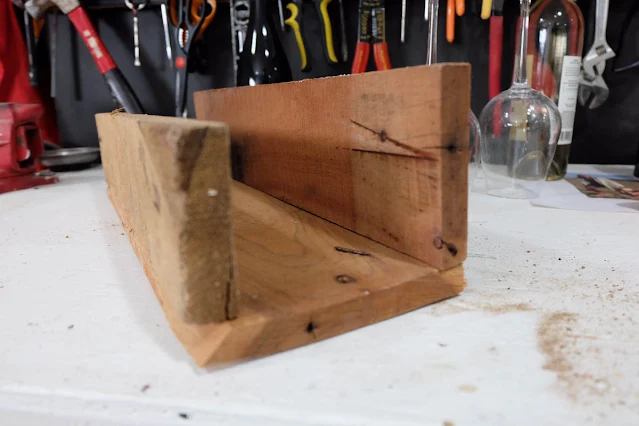 |
| Sorry, I know it's blurry. I'm extraordinarily frustrated by my camera lately. But you get the gist here. |
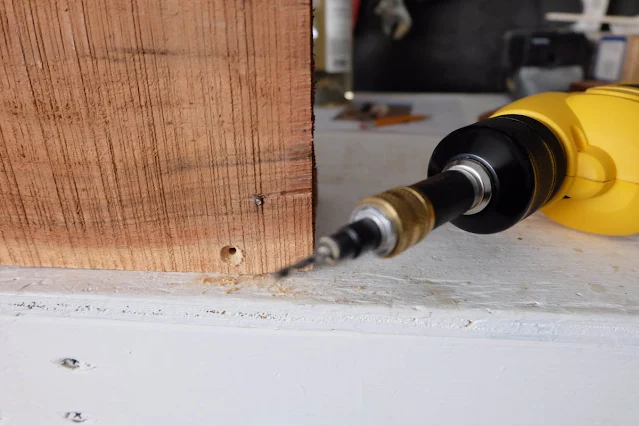 |
| Ugh, camera, come on. Oh and yes, I got a new corded DeWalt drill* thanks to you kind folks voting for the Wood Block Headboard in an Instructables contest, thank you! Nice tool, except the plastic chuck loosens on its own far too often. |
I’m using square head screws* here rather than Phillips as I find they’re more secure in the driver bit, less stripping of the head, but that meant I was inefficiently changing out three bits. Whatever, I had time, no biggie.
Ok next were the vertical sides which I trimmed down to juuust tall enough for upright bottles' easy clearance. And for two glasses to hang upside down.
Those tall side pieces I attached to the box side pieces in the same multi-step heh pilot drill pilot drill screw in process.
Ok next were the vertical sides which I trimmed down to juuust tall enough for upright bottles' easy clearance. And for two glasses to hang upside down.
 |
| My vertical side pieces. Yep. |
 |
| Yep. Drill and drive, baby, drill and drive. |
Mmk, moving right along. The top!
The top was the most complicated as it had the most to do. Using a wine glass, I eyeballed about where it needed to hang, marked on center, then measured so it'd be even on both sides.
The top was the most complicated as it had the most to do. Using a wine glass, I eyeballed about where it needed to hang, marked on center, then measured so it'd be even on both sides.
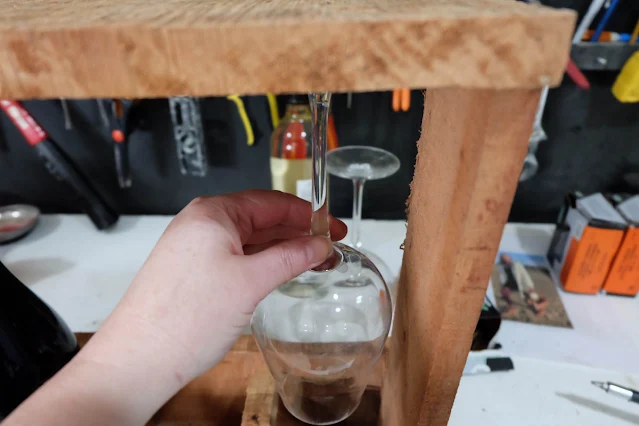 |
| Guesstimation is good enough me. |
Using a 1/2" Forstner bit,* I drilled through cleanly and easily. Be sure to slide a backer piece of scrap under where you're drilling.
 |
| I can drill holes. |
Next up, I marked forty five degree angles off the 1/2" hole, 3/8" apart kinda sorta-ish close enough, and pushed those through the band saw. I managed to work it so that there's an arc of the drilled out cicle acting as a hook, a stop, ensuring the glass doesn't slip out easily.
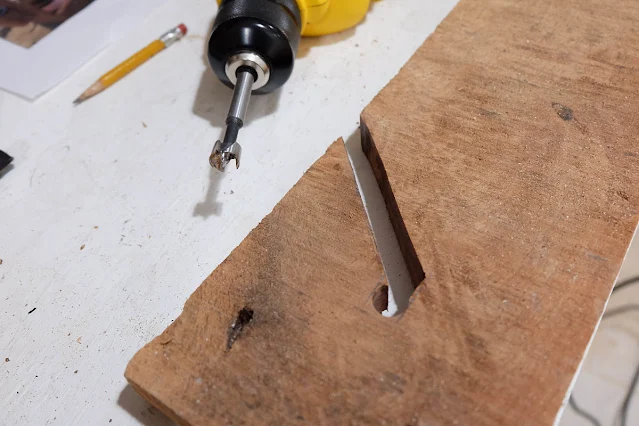 |
| Sure it's a wibbly cut, that mahogany is hard freakin' wood, I was free-handing on the band saw. But it worked! |
Righty-o, next was figuring out the handle. As I didn't have any drawer pulls or what-have-you about, I grabbed a leather belt, trimmed off about ten inches or so and with three screws, attached one end to the top. Be sure to pilot drill through both the leather and wood.
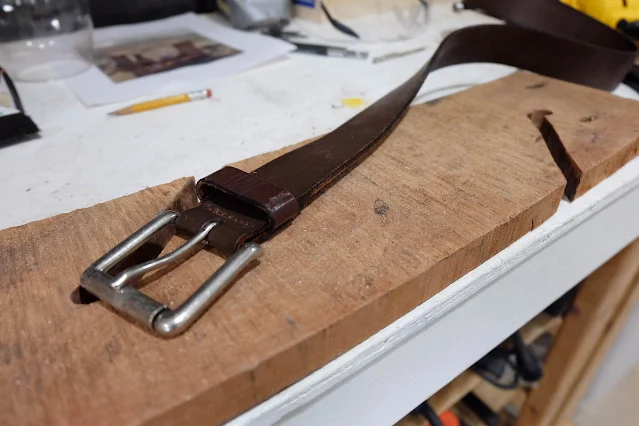 |
| A thrift store belt I had planned for another project but changed my mind on. Handy to keep around! |
Scrunch the leather until it bows up into a handle, then attach the other side to the wood. Voila! Handle!
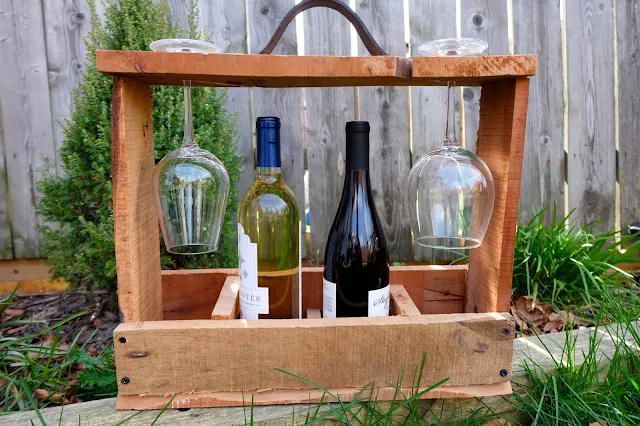
Ok, final assembly, just attach the top to the vertical sides and you're done. Or, if you'd like, you can add dividers as I did, being the two bottle family that we are. The pieces were trimmed to be super tight, wedge right in there, so no fasteners involved.
Feel free to add a little storage box on the side like the original but if you build the size I've drawn, there's extra space for carrying items like openers or whatever. Too, feel free to attach a bottle cap opener. I mean, the customization options are endless, really.
FYI, stuff does clink and clank around in there a touch so carry carefully, plan for more space around the items, or tighten up the glass storage. Or plan it so the glasses are in the middle, the bottles on the outside.
Don't forget, if you're not already subscribed to this here spiffy blog and want the plans for this, subscribe here!
Special thanks again to NewHomeSource, inviting me to share spring 2020 interior design trend predictions! Catch the article here!
*The flip drive quick change drill bit, drill bit sets, various screws, wine glasses, DeWalt corded drills, square socket screws, and Forstner bits are Amazon affiliate links. Mwah, thanks! Please see the "boring stuff" tab for more info.







Post a Comment
Please no spam or links, thanks!